Making The Perfect LED Spiral
2015: Hack
As mentioned in my previous post, I have four pillars on the front of my house that are just begging to be covered in lights.
My approach last year was to run around the pillars with a bunch of Christmas lights in my hand and let them wind themselves up. It was a quick and effective method, but the spacing and angle of the lights were far from perfect. It also made me quite dizzy.
2016: Craftsmanship (Hopefully)
This year the pillars will be pimped out with RGB LED strips, and I turned to the powers of mathematics to help me create the perfect LED spiral.
My goal here is to have all four pillars set up identically. To achieve this, I needed to learn a bit about how spirals work. After some Googling, I came across this New Mexico State University page.
Crunching The Numbers
- Pillars:
- Height: 1890mm
- Circumference: 395mm
- LED Strips (1 per pillar):
- Length: 5000mm
- Width: 13mm
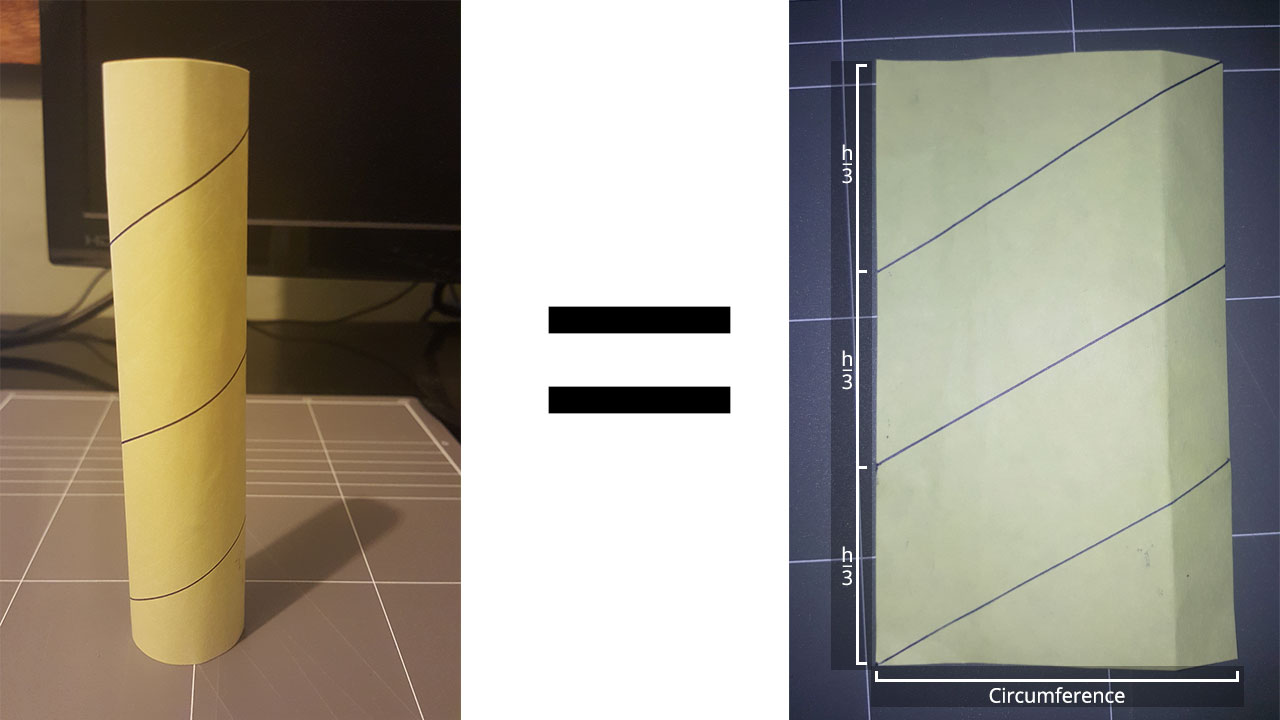
The formula to describe the length of n spiral loops around a cylinder of height h and circumference c is as follows:
This is pretty neat formula, I recommend taking a look at the link above. Essentially, we solve for the length by using the height and circumference of the cylinder the base and hypotenuse of an isosceles triangle, respectively. If we have multiple loops, they each take up an equal proportion of the height of the cylinder, so we divide the height by the number of loops.
For example, take a cylinder with three loops:

However, the length of the LED strip is already known (5000mm). This means that we need to change the subject of the equation from l to n, since the number of loops is what we really care about here.
Now, my high school math skills are quite rusty, so instead I just plugged values into this formula until I arrived at something very close to 5000mm (Sorry, Mr. Clarke). The result ended up being that I could fit 11.72 loops onto each pillar.
Dividing the height of the pillar by the number of loops yields 164.3, which gives me the gap between each loop at any point in the spiral.
A Consistent Angle
Ok great, I can fit 11.72 loops onto my pillar. This information gave me something to aim for, but it didn't really help me to make my work more accurate. I needed something more. I decided that "something" was a template I could use to guarantee consistent pitch and spacing of the strip:
Templates Make Everything Easier
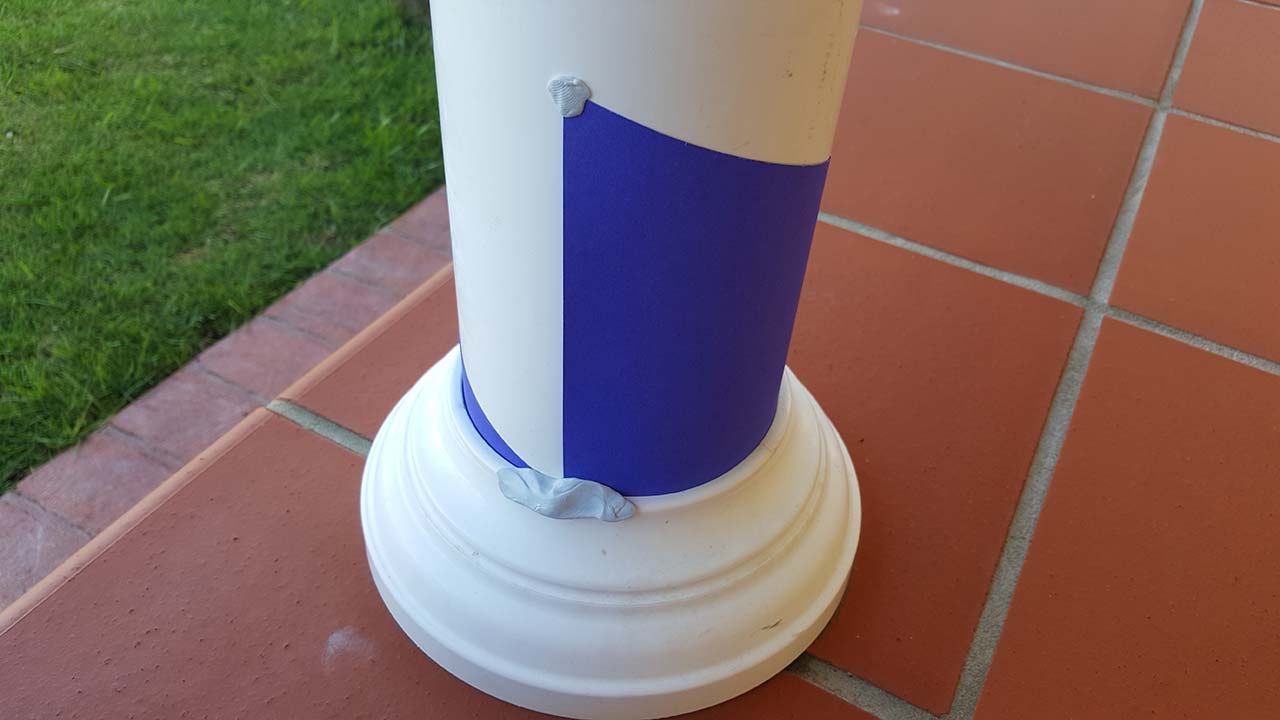
I made two templates. The first one is a triangle shape, used for the bottom-most loop of the spiral. The dimensions of the template are as follows:
- Width: 395mm
- Height: 151.3mm
The width is simple enough at 395mm (the circumference of the pillar), but where does the 151.3mm height come from? Well, it's the gap between the spiral loops (as calculated previously), minus the width of the LED strip itself.
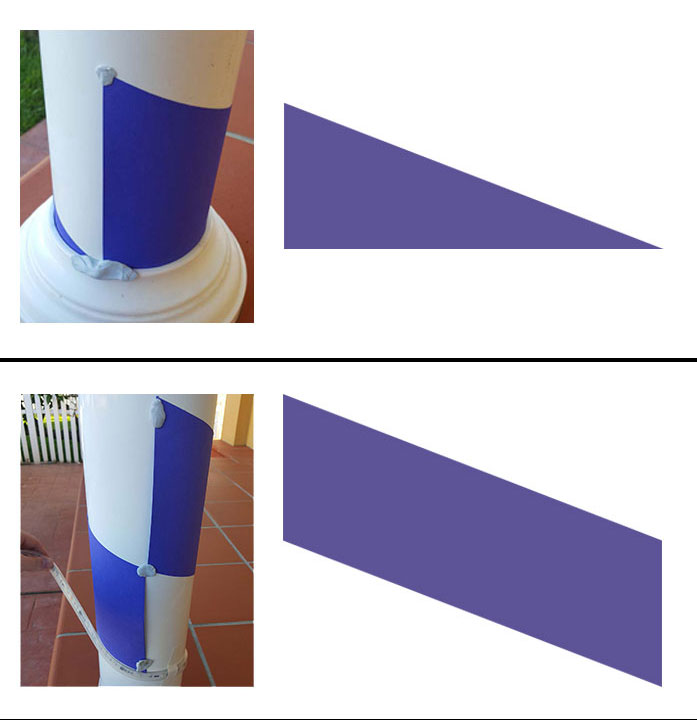
The second template is for the general case, where one spiral needs to sit atop another.
As with the previous template, the width is simply the circumference of the pillar. The height is 302.6mm, i.e. double the height of the first template. This is because we need a consistent gap, but the spiral itself is getting higher at the same time. Overlaying the templates on the previous flattened cylinder image makes this clearer:
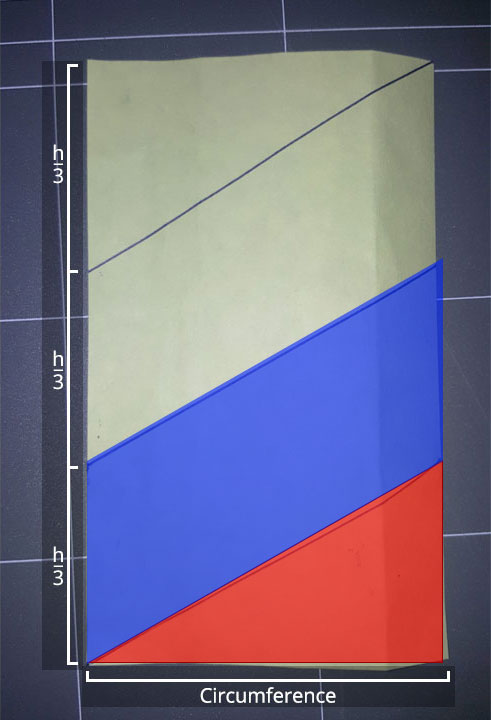
The red triangle is the first template, which has a flat bottom because it's sitting against the bottom of the cylinder. The blue quadrilateral is made up of two triangles with the same dimensions of the first template. All subsequent loops will use this template.
Finally...
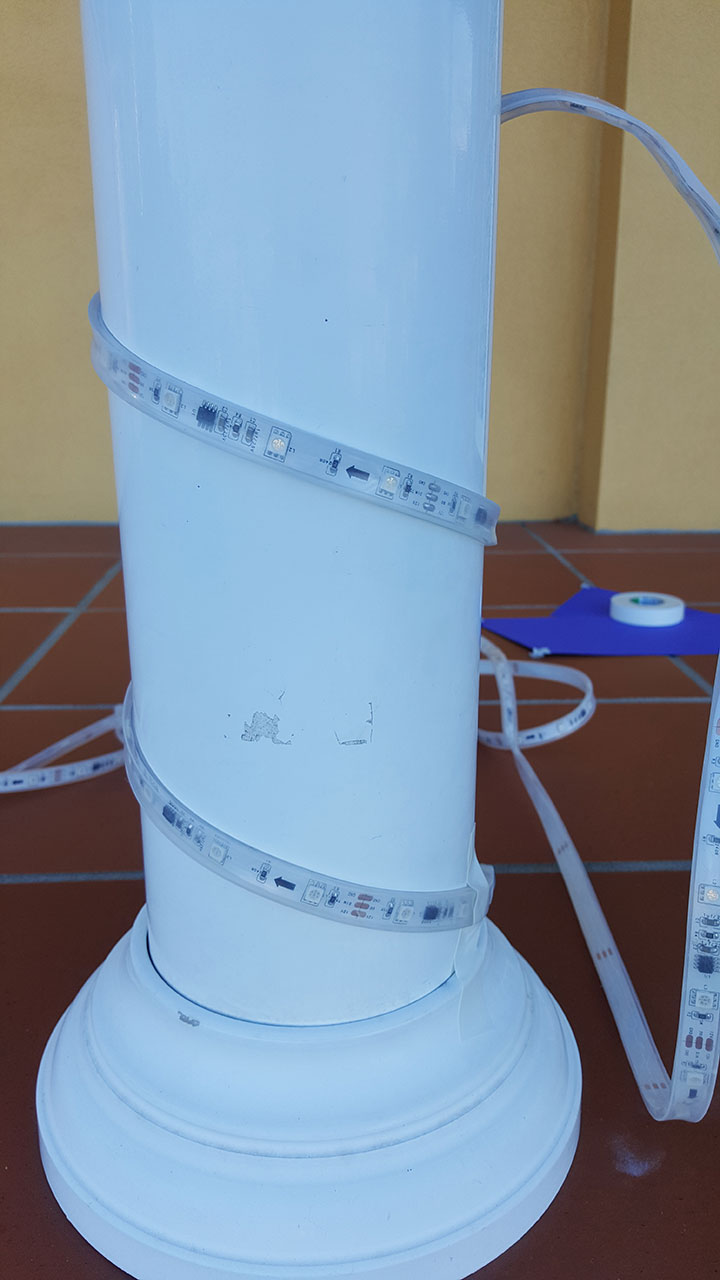
I didn't wrap the pillar in its entirety, because I didn't have time to take it down again, but here are the first two loops of the spiral in all their glory: