A Home-made PCB Workstation On A Budget
Third Hand
Back before I started tinkering with electronics, I bought a third hand. I didn't have any particular use for it, I just thought it was a nifty thing to have laying around.
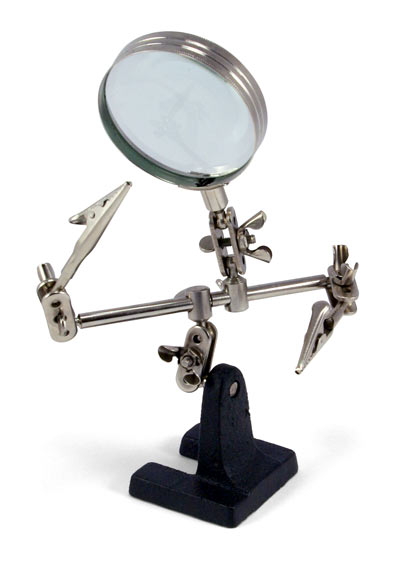
As I began learning how to solder, I found the third hand quite useful for holding circuit boards and wires. However, as I progressed I grew more and more frustrated with the lack of manoeuvrability the third hand provided.
If you haven't seen one of these before, they look like this:
Third Hand++
The horizontal bar that connects the arms to the stands limits the usefulness of this tool. I looked online for alternatives, and found an Instructable for a home-made PCB workstation called Third Hand++:
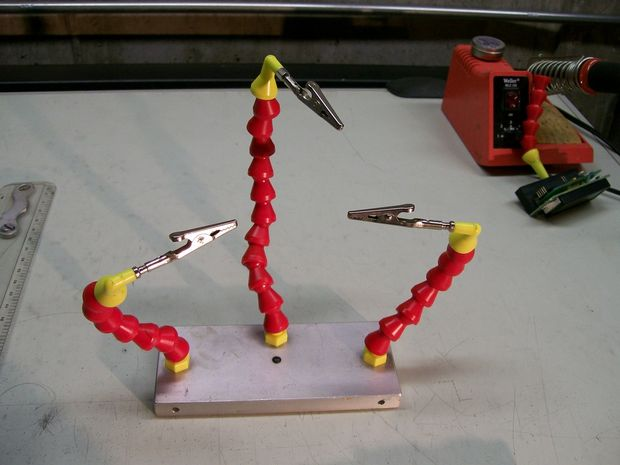
I liked this setup much more than the conventional third hand. Unfortunately, living in Australia, some of these materials aren't as easy or cheap to come by. Therefore, I decided to make my own clone of the Third Hand++, using cheap and/or readily available materials.
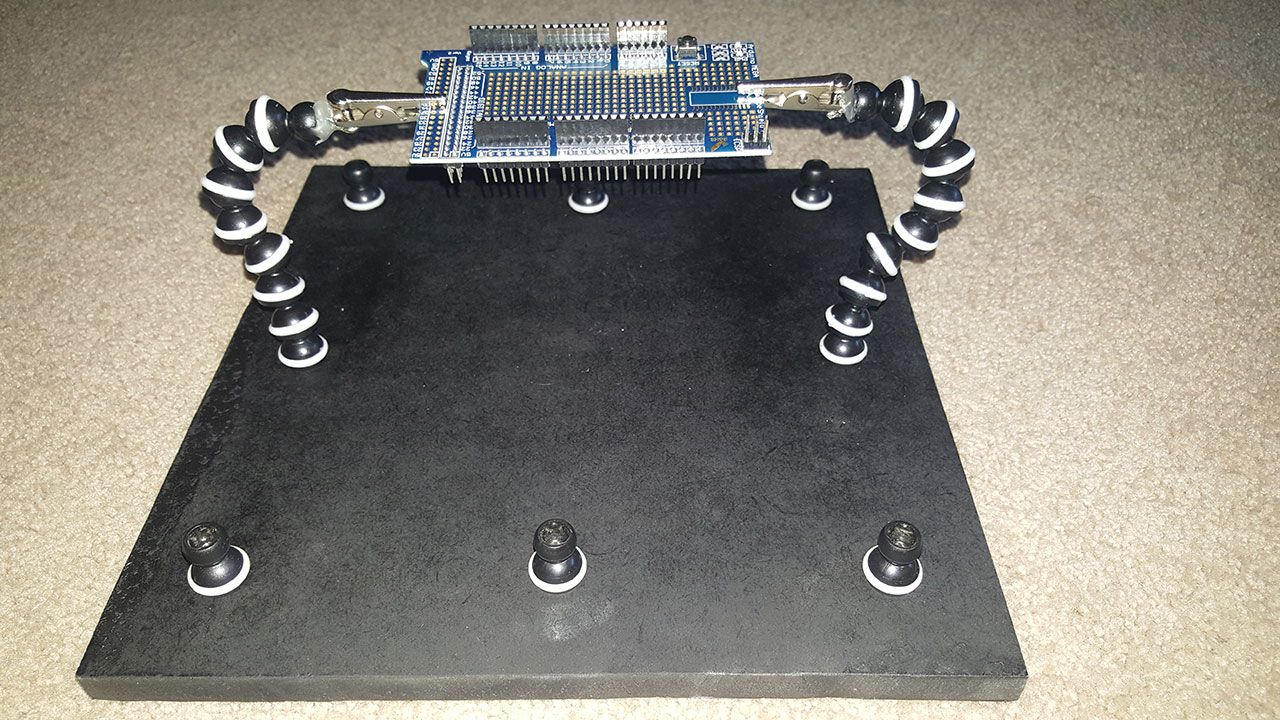
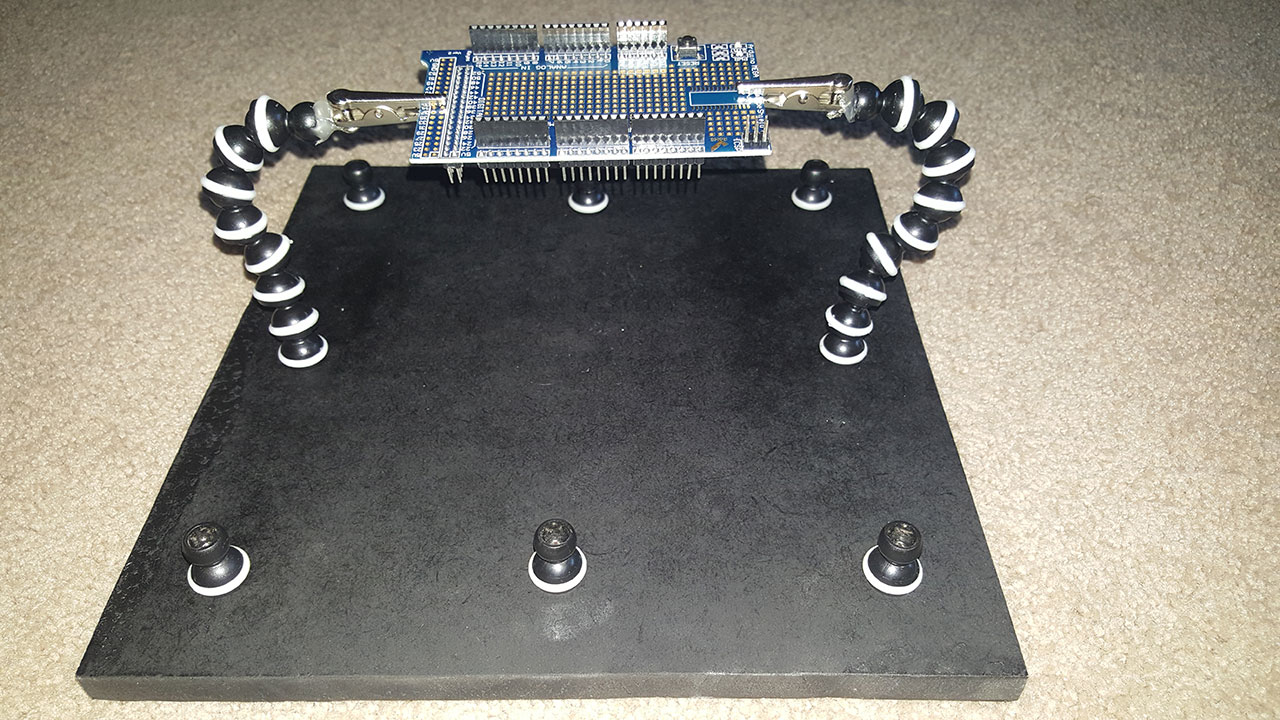
My PCB Workstation
Here's my workstation, in all its splendour:
Equipment Required
- Some kind of cutting device, e.g. circular saw, jigsaw, hacksaw (along with appropriate safety gear!)
- Hot glue gun (I suspect a silicone gun would work too)
- Blu-Tack
- Electric drill
- 3mm bit
- 5mm bit
- 10mm bit
Materials
| Item | Price (AUD) |
|---|---|
| Projecta Alligator Clips - 6 Pack | $2.50 (Bunnings) |
| CustomWood MDF 900 x 450 x 12mm Standard MDF Panel | $8.15 (Bunnings) |
| Fiddly Bits 250g Flat Black Spray Paint | $2.95 (Bunnings) |
| 20mm x 3mm Steel Screws - Pk.25 | $3.50 (Jaycar) |
| 3mm Steel Nuts - Pk.25 | $2.95 (Jaycar) |
| Madico 19mm Clear Round Vinyl Surface Protection Bumper Pads - 6 Pack | $4.25 (Bunnings) |
| 2 mini tripods (search eBay for "Mini Octopus Flexible Tripod", lowest price first) | Approx. $7.50 for 2 tripods (eBay) |
| Total: | $31.80 |
It's worth noting that all of the above materials, apart from the tripods and (optional) foot stickers, are enough to make at least two of my PCB workstations. If you can find a smaller MDF board and smaller packs of screws and nuts, you will be able to significantly reduce the price to create one workstation.
Construction
Step 1: Measure and Cut MDF
You can make your workstation any size you like, but there are multiple variables to consider, such as:
- The weight of the base
- Ease of portability
- The size of the PCBs you want to work on
- The number of anchor points you want
- The strength and flexibility of the arms
The last one is important. If your arms are too long, they won't be able to hold much weight at all. However, if they are too short, they won't be flexible enough to be particularly useful.
I settled on making my board 25x25 cm with 8 anchor points, which I'm happy with in retrospect.
So, the first task is to cut your board to size.
Step 2: Mark the Holes
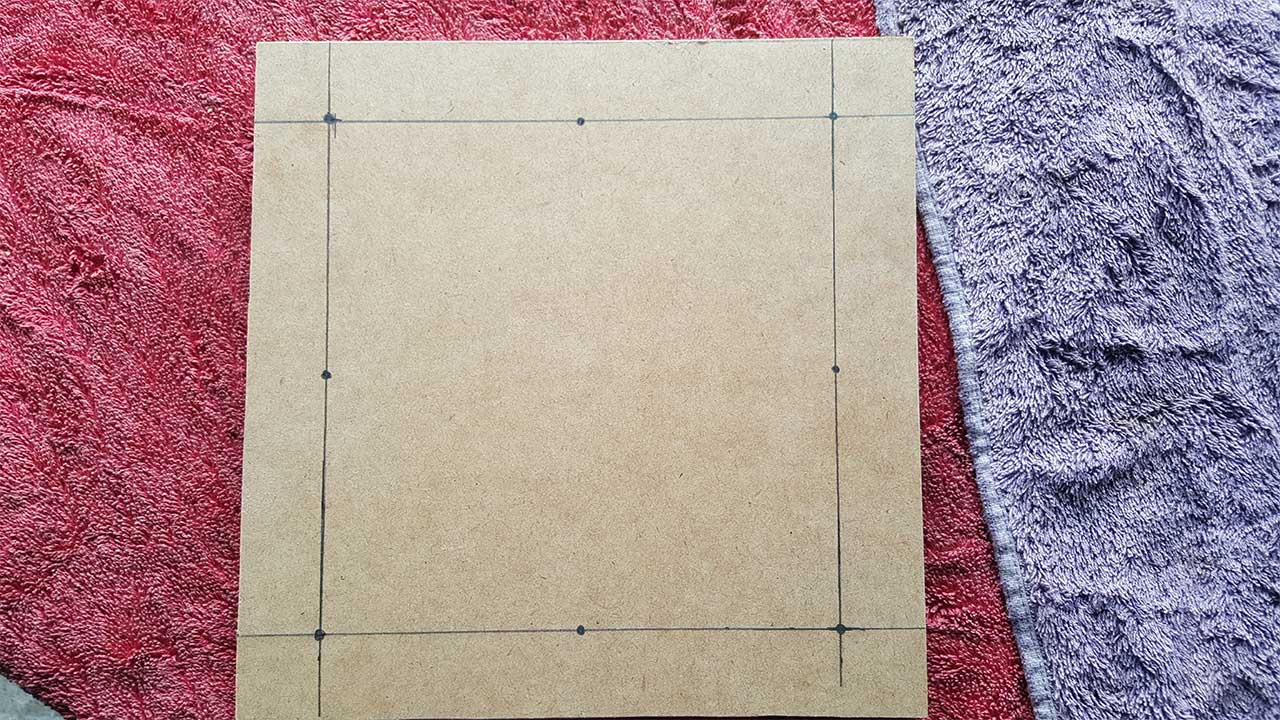
I made my four corner anchor point holes 2.5cm from each side of the board. The middle four anchor points are simply the midpoints between the others.
My resized MDF board with marked anchor point holes:
Step 3: Drill the Holes
Using a 3mm drill bit, drill out all of your marked anchor points, the whole way through.
Using a 10mm drill bit, drill shallow holes into the anchor points on the underside of the MDF (it doesn't matter which side, use the rougher/uglier side if there is one). The idea here is to provide a hole large enough for the nut to fit into so the MDF can sit flush on a surface.

Step 4: Spray Paint
This is where you can let your inner artist blossom, or in my case, not. I opted for el cheapo matte black spray paint, which looks awful in the image below. This is largely because I don't have much experience spray painting, and also because the camera flash throws my inadequacies into sharp relief.
Still, my advice is to make several light passes over one side (and the edges), then flip and repeat once the paint is dry.
Step 5: Attach Bumper Pads
Nothing too exciting here, just flip your MDF over and stick on the rubber/vinyl bumper pads. This will prevent your workstation from scratching whatever it's sitting on as you move it around.
Step 6: Attach Anchor Points
You know those tripods I told you to buy? This is where they start becoming useful. Yank off the three legs, and do what you wish with the holder section.
With a little force, these segmented legs come apart. Pull out as many individual segments as you have anchor points, and drill a hole down the middle of them using a 3mm bit. I used my Dremel drill press, but I imagine it can be done using a regular drill and. Be careful to get the hole in the centre, or you'll drill through the side of the anchor point.
If you've succeeded, you should now be able to attach the anchor points to your MDF using the 20mm screws. These screws were just long enough for me to attach with countersunk holes. I had to make a few of my countersinks a bit deeper to get them on. I put my screws in so that the nuts are on the underside of the board, and the screwheads are in the top of the anchor points.
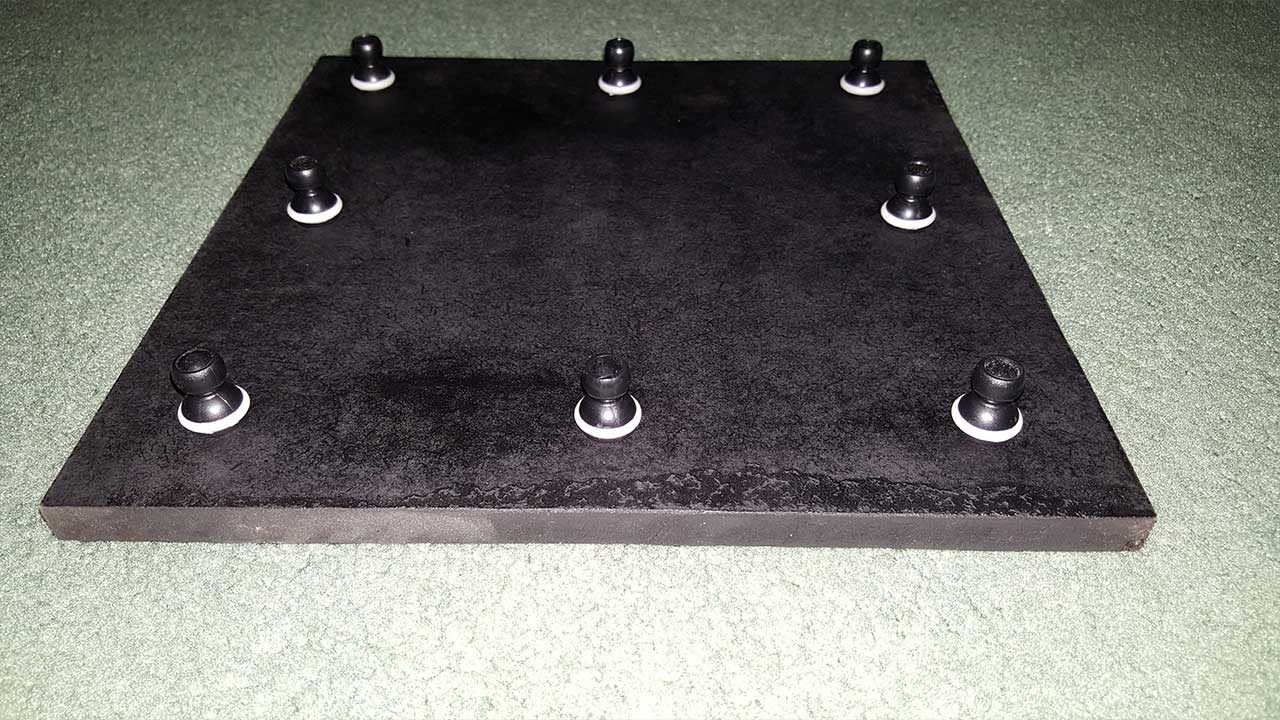
Once your anchor points are attached, you should have something that looks roughly like this:
Step 7: Make Tool Arms
Now for the (relatively) tricky part: putting the alligator clips into segments to form tool arms. Start by figuring out how many clips you think will be useful. If you want lots of clips, you may have to purchase more tripods so you have more arm segments to work with. I decided to make four tool arms.
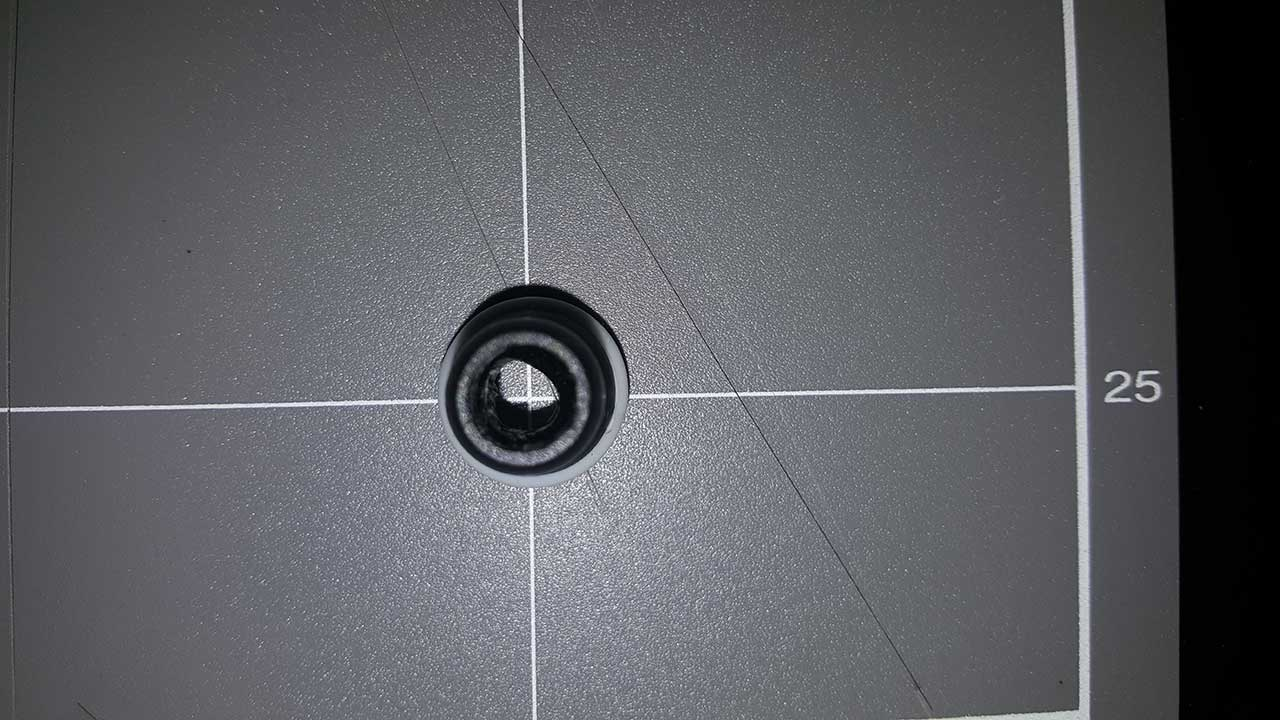
My alligator clips have a 5mm diameter at their base, so I drilled a 5mm hole into four segments (I actually used my Dremel cutting bit to hack a hole roughly 5mm, but a 5mm hole would be a bit cleaner. You can see my rough handiwork below:
Now, get a blob of Blu-Tack about the size of a grape. Sit the anchor point on it, large side touching the tack. Push hard so that the tack fills up most of the large chamber in the segment.
Next, gently push an alligator clip through the top (small) hole, so that it's held in place by the tack. The clip should protrude from the segment just enough to allow the clip to be opened and closed without interference.
Finally, use a hot glue gun to pump glue in around the clip shaft, filling up the small chamber. Leave to solidify, then gently remove the tack. The large chamber should be mostly devoid of glue, as it needs to be empty to accommodate other segments being pushed into it.
If you want to tidy up the glue, you can carefully cut and scrape away excess using a sharp blade like a craft or X-Acto knife.
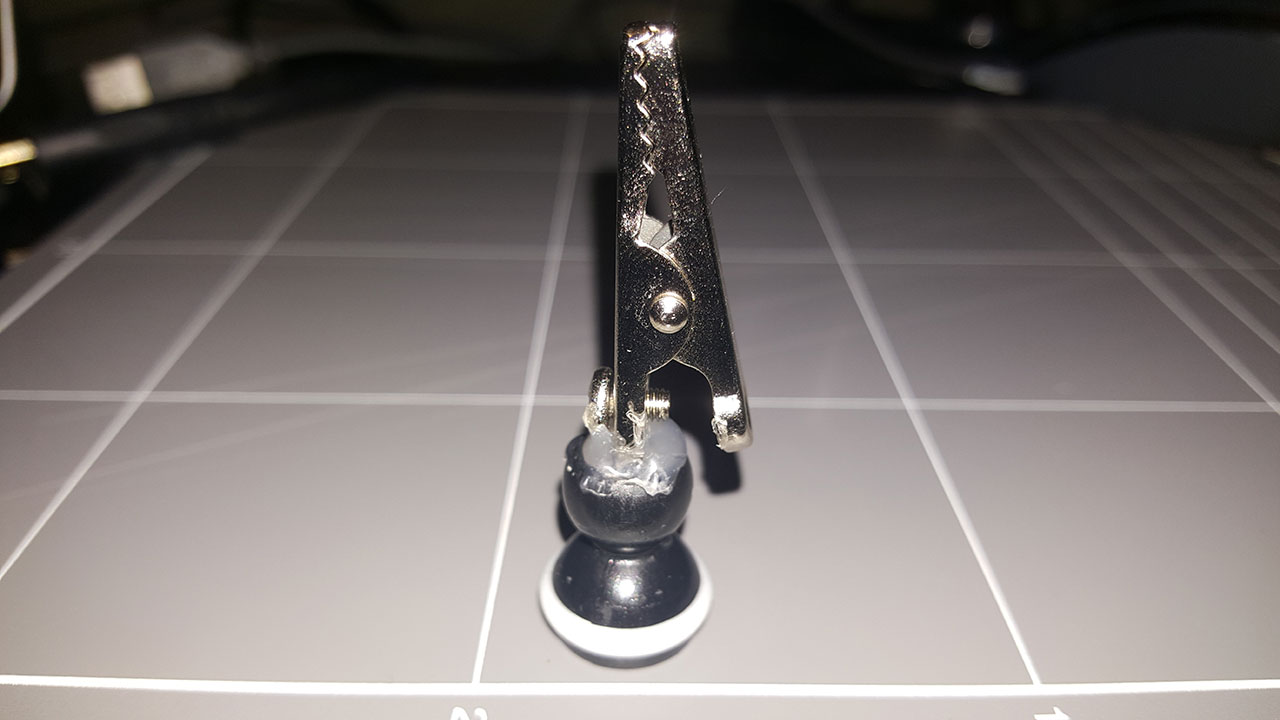
The end result should look something like this:
Step 8: Pat Self On Back
Congratulations, you've created all of the components for your PCB workstation! All you have to do now is grab a chain of segments, plug them into an anchor point, and attach a tool arm to the end of the segment chain.
Future Enhancements
There are a few things that could be done to this workstation to make it even niftier, such as:
- An LED tool arm, powered by 2xAA batteries attached to the board.
- A small fan tool arm, to extract soldering fumes (maybe the fan could be held up like a diamond, with two anchor points for added stability. This would need to be powered from something beefier, like a 12V power supply.
- Shrink wrapping the alligator clip jaws to help prevent wear and tear to PCBs.
- Attaching a PCB Holder to the base of the workstation.